Use the steps below to install the Cloud Backup agent on a Linux VPS or dedicated server. Follow the directions for CentOS/RHEL, or Debian/Ubuntu, depending on your operating system, then proceed to the Final Steps section below.
Switch to root user:
su root
Download the script, give it executable permissions, and execute it:
CentOS 7:
wget https://www.solvps.com/src/backup/install-el7.shchmod a+x install-el7.shsh install-el7.sh
CentOS 6:
wget https://www.solvps.com/src/backup/install-el6.shchmod a+x install-el6.shsh install-el6.sh
The script will download and install the Cloud Backup agent, then automatically build the required kernel module. Please contact Technical Support if the script fails to properly complete the installation on your CentOS/EL system.
Switch to root user:
su root
Download the script, give it executable permissions, and execute it:
wget https://www.solvps.com/src/backup/install-deb.shchmod a+x install.shsh install.sh
The script will download and install the Cloud Backup agent, then automatically build the required kernel module. Please contact Technical Support if the script fails to properly complete the installation on your Debian/Ubuntu system.
After successfully installing the agent and kernel module on your VPS or dedicated server, return to the Backup Manager panel, go to the Servers page, and click Actions icon > Edit Server.
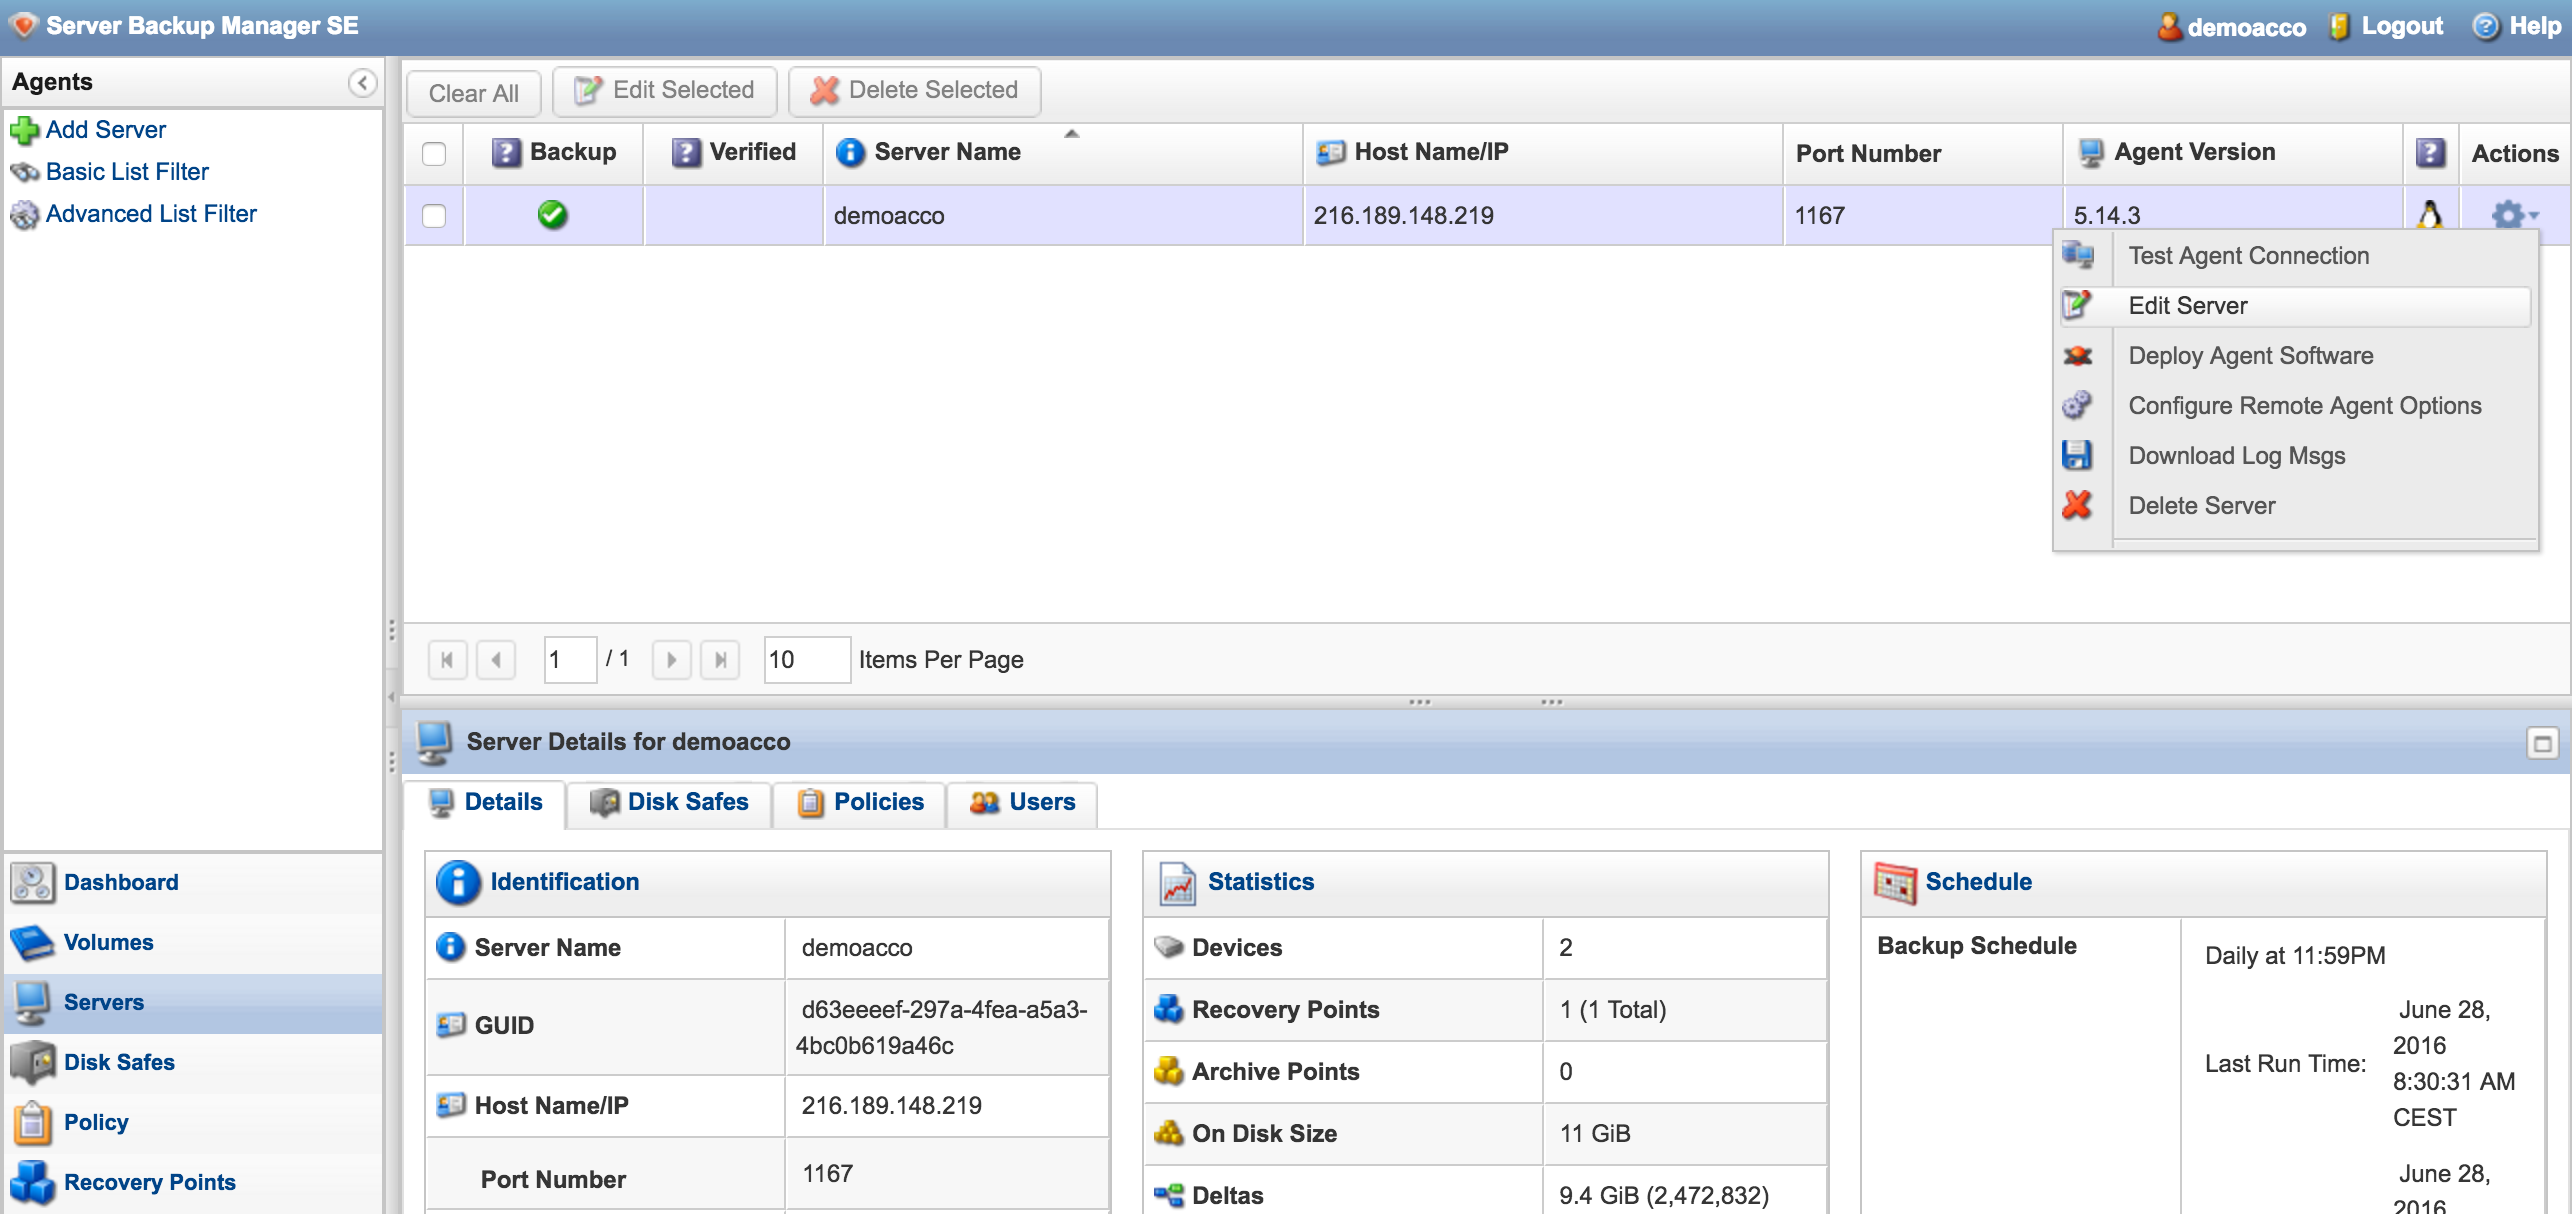
On the Edit Server window, click Reset Public Key.

Now click the Actions icon > Test Agent Connection. If all went well, the Backup Manager will successfully connect and authenticate with the server.
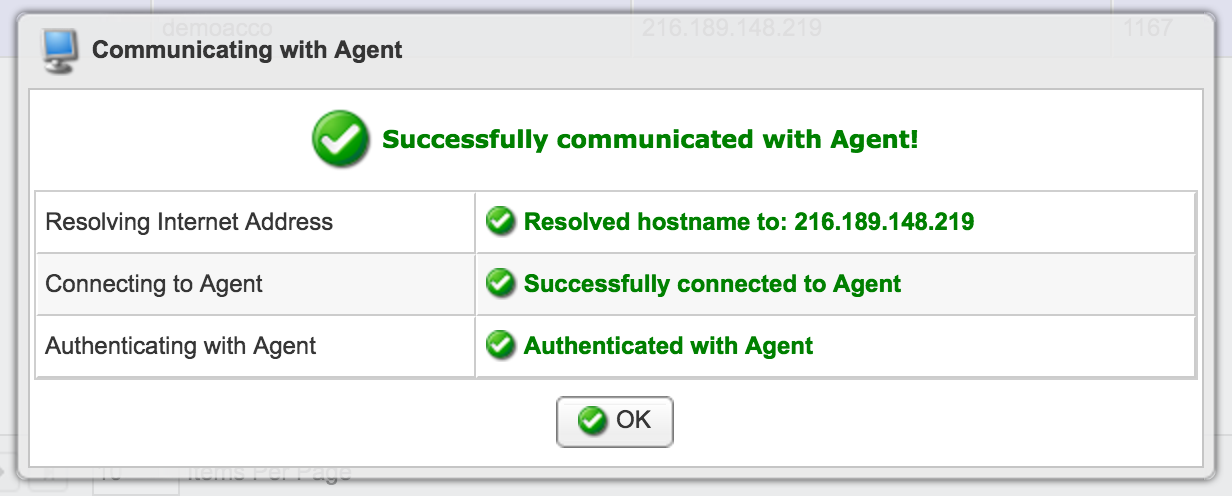
The Linux server is now activated for backups, and it will begin backing up on schedule according to its Backup Policy.
Lightning-fast VPS hosting with enterprise SSD storage, global data centers, and 99.99% uptime. Built for developers, trusted by enterprises.
support@solvps.com
1-888-256-8213